Hello everyone and welcome back. Today I created this fun 3×3 mini card album using Designer Series Paper (DSP). NO STAMPING! Of course you could add a little sentiment if you’d like. I think these are perfect to have on hand or to give as a gift. You can always add a sentiment when you are ready to give a card.
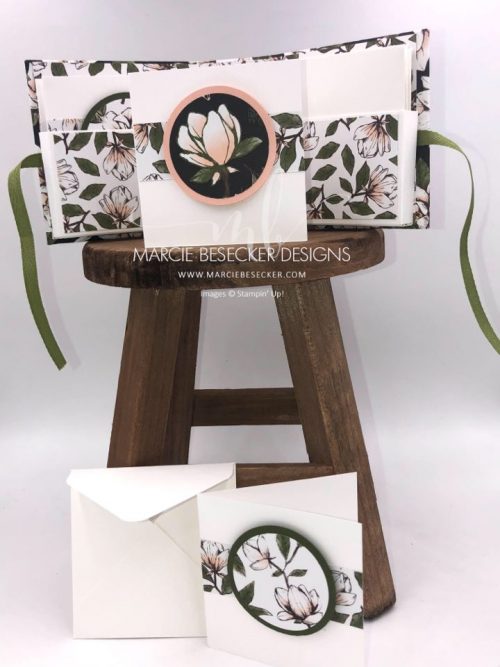
You will start out with Chipboard. This will help the outside cover be firm to keep the shape.
MEASUREMENTS
Chipboard:
(2) – 3 ½” x 3 ½”
(1) – 1 ⅛” x 3 ½”
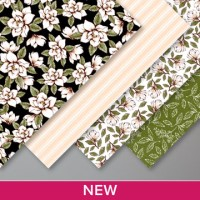
DSP:
Cover Paper – (1) – 10″ x 5″ (Mark the 5″ with a tic mark at the top)
Liner Paper – (1) – 8 ¼” x 3 ⅜”
Pocket Panel – (2) – 3″ x 1 ⅞”
Card Front – (4) – 3″ x 1″
White Card Stock:
Pockets – (2) – 5 ¼” x 3″ (Score ½” & 1″ on both short ends and one long end)
Cards – (4) – 3″ x 6″ (score at 3″)
Circle Punch – 2″ solid cardstock that matches DSP
Circle Punch – 1 ¾” punch DSP designs for your focus point
Envelope – 5¼” x 5¼” (score at 2 ⅝” on an Envelope Punch Board and follow rotation)
Make sure you space out your chipboard enough so the album can close. Glue them down and trim the corners (not too close to the chipboard). Add tear and tape to the edges and fold and adhere the long side, then the short side.


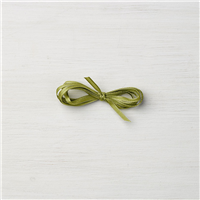
Before you add your liner, don’t forget to add your ribbon.

After you score the pocket, cut the corners off as shown. Fold each score line and glue the two sides to the bottom strip. Adhere the pocket to each side aligning with the side and bottom of the liner. HINT: When you add the ribbon and also adhere the pockets, fold the cover together to make sure your pockets and ribbon match up on each side.

Create your cards by layering your DSP strip, then layer your circles with glue and pop them up with dimensionals. The supply list will be listed below.

Here is a video with more helpful tips. (The video will not show up on email but will be on my blog).
I hope you enjoyed this post. It was a lot of fun to create. If you have any questions, please do not hesitate to ask. Don’t forget to subscribe.
Have a great day and stay safe. I think a lot of good is coming out of this Corona thing. I am looking to the positive side and love seeing all of the creativity… lots of cards, making masks, neighbors helping neighbors, etc. We will get through this. Hugs
I am adding my project to the Watercooler Wednesday challenge.


An amazing project Marcie. Great tutorial and video. Thanks for sharing with us at Watercooler Wednesday this week.
Thank you. It was a lot of fun. I look forward to the next challenge.
A lovely project, Marcia! It would make the perfect gift! Beautiful papers really brigs it to life. Thanks so much for sharing with us at Watercooler Wednesday Challenge this week. Take care! 🙂
Thank you for visiting. Looking forward to next week.
What a fabulous project Marcie. Thanks for sharing the video and tutorial. Think I’ll have to give it a go. Thanks for joining us at the Watercooler Wednesday Challenge this week. Tristan DT.
I hope you do. They are so fun to make. Thanks for having me. Looking forward to next week.