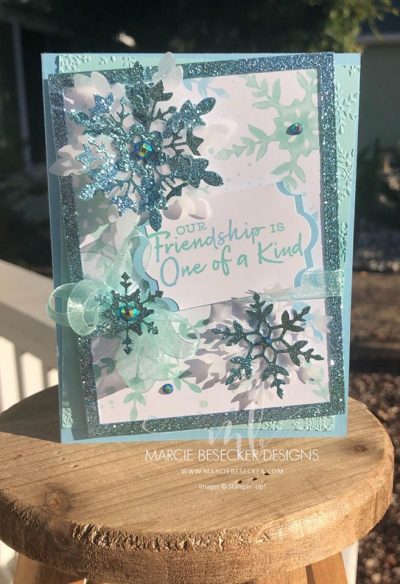
The Snowflake Wishes Bundle is a part of the Snowflake Splendor Suite. This suite has so many amazing products including stamps, DSP, glimmer paper, embossing folder, ribbon, gems, etc. The ribbon is the only thing I chose not to use. I really liked how the Pool Party Sheer Ribbon popped so that is what I chose to use.

Details:
I used the Balmy Blue Glimmer paper as a border/frame around the DSP and for the snowflakes to add that extra sparkle. Before I adhered them to the card, I also took a portion of one of our sponges and rubbed Coastal Cabana ink onto the glimmer paper randomly. So in person you can see the green and blue on the glimmer paper. I used the darker color and not the Pool Party because I really wanted it to show up on the glimmer paper. I did this AFTER the items were cut out. That way I could add the color where I wanted it and have an even coverage of both colors.
I also cut snowflakes out of vellum to just add layers to those snowflakes and help the glimmer paper pop up a bit. The larger snowflake on the top I layered up with two vellum snowflakes using the larger, more solid, snowflakes. Below I used another smaller snowflake in vellum to layer up. Popping a small snowflake up on the center of the bow really was a final touch.
I used the Everyday Label Punch to create the layered label. Stamp the sentiment onto the Whisper White cardstock and then cut the colored label down the center vertically so that the ends of the label would peek out on each end. The card base is Balmy Blue and the accent embossed piece behind the DSP is Coastal Cabana and has been embossed with the Winter Snow Embossing Folder (4″x 5.25″). This just peeks out behind the main panel with the glimmer paper and DSP. The glimmer paper was cut down by the largest two dies from the Rectangle Stitched Dies. The DSP is slightly smaller (about 3.75″ x 5″)
Tie your Pool Party Sheer Ribbon around the top two panels and then pop them up on dimensionals on top of the card base. Add the Blue Adhesive gems and you are done!
The cards looks like a lot of steps but it is actually easy. I hope you enjoyed this tutorial.
Additional Examples:
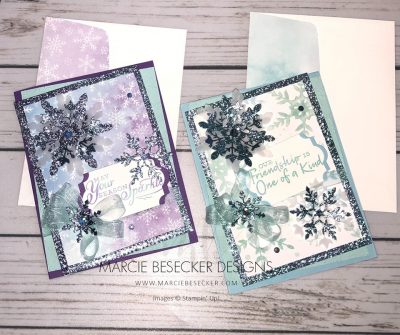
Here are a couple of other images adding the Gorgeous Grape ink to the Balmy Blue Glimmer Paper and some Heather Highland cardstock.

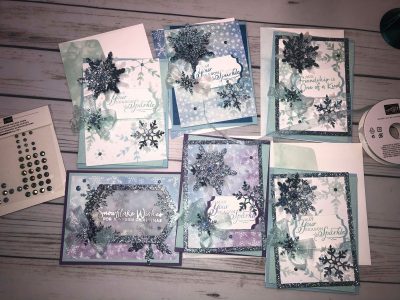
Cards we did in class and a few I did after the video. These are so easy to do in bulk.
Here is a PDF Snowflake Splendor for you to have for this project.
The video on the blog will show the assembly in more detail. In the video I forgot to color the snowflakes just like I did the border of glimmer paper. Make sure you add a little accent color to those too!.
Don’t forget to add some DSP to the flap of the envelope and a trimmed piece to the bottom of the insert inside the card.

SUPPLIES (listed on my blog):

hi where do i get directions for the Snowflake Wishes card
Is this the one you are talking about? https://marciebesecker.com/snowflake-splendor-suite/