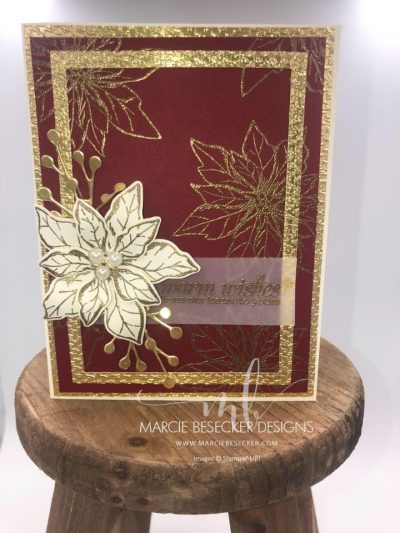
The Poinsettia Place bundle is stunning and a must have. This card will show you what the Poinsettia Petals Bundle and the Beaded Pearls can do on their own. This card just screams elegance.

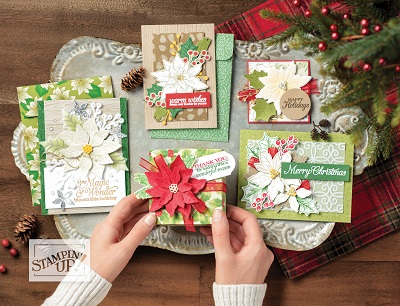
The Poinsettia Place Suite has so many fun elements to it. See below a variety of examples.
Elegant Poinsettia Instructions:
This Elegant Poinsettia card is so simple but sparkles and just screams elegance. I am using the
Poinsettia Petals Bundle with the Beaded Pearls to add that extra glimmer.
Measurements:
1 – 8 1/2 x 5 1/2″ Very Vanilla Thick card base
1 – 3 7/8 x 5 1/8″ Cherry Cobbler card stock
1 – 4 1/8 x 5 3/8″ Gold Foil Base color
1 – Very Vanilla card stock to stamp two smaller poinsettia images to create the flower on the front of the card.
1 – piece of Vellum measured to the size of your sentiment.
Directions:
Use the 2nd and 3rd (from the largest) Stitched Rectangle dies to cut the top border out of the gold foil. You want to emboss AFTER you cut your borders because you will use the center piece for your gold foliage behind the poinsettia. Once they are cut, you take the outside two borders and emboss them. By using the embossing folder, it really adds some texture to the card.
Use an embossing buddy or something like it to get rid of the static cling on your card base and vellum for embossing. On the Cherry Cobbler panel, you use versa mark and gold embossing powder and stamp your poinsettias randomly on the page with a decent amount of space in
between each. Layer the smaller border piece on top of the Cherry Cobbler piece.
Stamp your sentiment with gold embossing powder on vellum. Stamp and emboss your poinsettia on Very Vanilla, layer them up and pop it up with a dimensional.and adhere it on top of the edge of your sentiment.
Use your multi glue and adhere your foliage behind your poinsettia. Top the whole card off with the gorgeous Beaded Pearls.
For your future reference, here is the Elegant Poinsettia PDF.
Christmas Countdown:
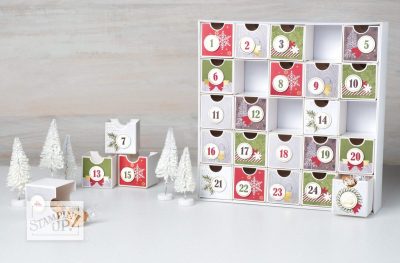
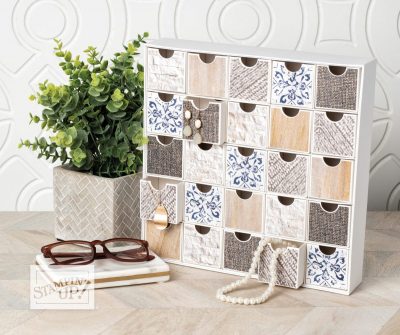
The Christmas Countdown advent calendar is so versatile. You can use it for the holidays but then can turn the boxes around to create a jewelry or trinket box.
The video on my blog shows both of these projects and gives some helpful tips.
Don’t forget to visit our new and improved Stampin’ Up website. It has great graphics and is geared to be user friendly for our customers. I really like it. Let me know what you think when you get a chance.

Supplies:


Can you tell me where you got those plastic pockets for your dies? I put mine on magnet sheets like that but I would love to also put them in plastic pockets with tabs for storage.
I am an affiliate with Stamp N Storage. You can click the link on the front page of my blog. Look on the right and scroll down. That will take you to their store. They sell the magnets and the pouches separately. I use the 6 x 7″ pouches. I’d appreciate it if you use my link. Thanks! Let me know if there is anything else I can help you with.