• Skip to primary navigation
  • Skip to main content
  • Skip to primary sidebar

Marcie Besecker Designs

Paper Crafting is my therapy!

  • Home
  • New/Online Exclusives
    • New
    • Online Exclusives
  • Bingo/Classes/Paper Share/Misc
    • Bingo / Classes / Paper Share / Misc
    • Shop Stampin’ Up! Online
    • IN-PERSON Classes
    • Video/PDF Only
    • Available Kits
    • Join Paper Pumpkin
    • Clearance
  • Videos
  • Join My Team
  • About Me / Contact
  • Team Home
    • Team Meetings
    • PDFS
    • Quick Reference
  • Request a Catalog
  •  

Forever Greenery and a Stamping Hack

May 16, 2020 3 Comments

I can’t express enough how much I love the Forever Greenery Suite and how it is my favorite Suite.  When I saw it in the catalog I knew it was a must have.  I have done many YouTube videos before but today was my very first Live video on YouTube!  This was the perfect stamp set to do my first video with.

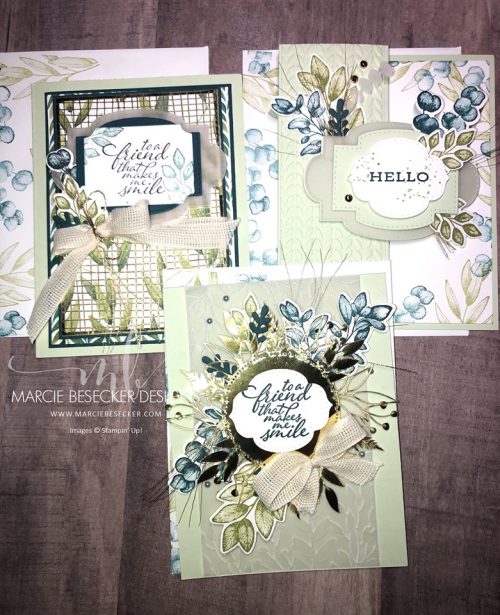
I was reminded of a fantastic stamping “hack” that I had not used in a very long time (Thank you Donna Gray).  I use to do this when I would create a ton of swaps for conventions.  You always hear “stamp then die cut”, however in this hack you die cut first and this stamp set is perfect to use this hack.   Die cut as many leaves as you want.  They can be randomly all over your paper, however you want one die template to use once all of your pieces are cut (as seen below).

Die cut then stamp

Once you are done cutting your pieces, lay your stamps into the cut areas and then close your Stamparatus to adhere the stamps.  Now you can place each of your leaf cuts into their shape and then stamp.  Keep in mind if you want to use different colors, you want to group the leaves together that will use the same ink color to help things move faster.

Below you can see that I did the multiple leaves and also some sentiment labels.  Just create a template using these and you can pop them in and add different sentiments.  The YouTube video below shows how I did this and the thought process when creating these cards.  I knew which suite I wanted to use but didn’t really have a plan (Video not viewable in email).


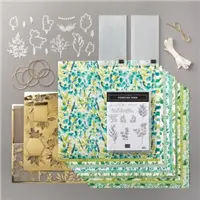
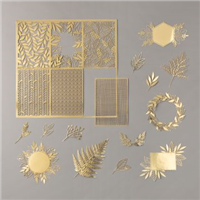
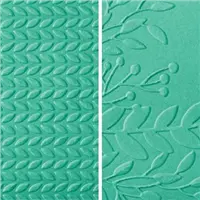
Thanks for stopping by.  The items used in this video are listed below.  Please take a minute to Subscribe to my blog and my YouTube.  Make sure to click the notification bell so that you can be notified when I go LIVE.  I’d love to have you join me,

Shopping with me is easy!  Go to my Blog on the top right side it says “Shop My Online Store” and right below it there is the Hostess Code for the Month.  Please add that in to your order and you will go into the monthly drawing

I appreciate your support and I will see you soon.

154094
Forever Fern Bundle (English) – 154094

Price: $54.00

154143
Forever Greenery Suite Collection (English) – 154143

Price: $105.00

147102
Soft Sea Foam Classic Stampin’ Pad – 147102

Price: $7.50

150083
Pretty Peacock Classic Stampin’ Pad – 150083

Price: $7.50

146988
Soft Sea Foam 8-1/2″ X 11″ Cardstock – 146988

Price: $8.75

101856
Vellum 8-1/2″ X 11″ Cardstock – 101856

Price: $10.00

152492
Forever Greenery Designer Series Paper – 152492

Price: $11.50

152493
Forever Gold Laser-Cut Specialty Paper – 152493

Price: $15.00

152716
Greenery Embossing Folders – 152716

Price: $8.00

151690
Stitched So Sweetly Dies – 151690

Price: $32.00

152886
Tasteful Labels Dies – 152886

Price: $31.00

146276
Stamparatus – 146276

Price: $49.00

152475
Forever Greenery Trim Combo Pack – 152475

Price: $9.00

104430
Stampin’ Dimensionals – 104430

Price: $4.00

144108
Mini Stampin’ Dimensionals – 144108

Price: $4.00

110755
Multipurpose Liquid Glue – 110755

Price: $4.00

104332
Snail Adhesive – 104332

Price: $7.00

Add All to Cart

Supply List

Pin3K
Share
Tweet
Share
3K Shares

Filed Under: Flowers, Forever Greenery Tagged With: Forever Fern, Forever Greenery, stampin up

Subscribe

to receive my articles delivered to your inbox!

I have been stamping on and off for over 25 years. I love learning new tips and finding new products and then sharing on my blog. I hope you'll subscribe and enjoy my posts. Thank you Read More…

Previous Post: « Painted Harvest a Must Have Stamp Set
Next Post: My Magnetic Die Storage with Sleeves »

Reader Interactions

Comments

  1. Donna

    March 3, 2021 at 5:02 am

    Wonderful technique! When you die cut, how sis you get the pies placed precisely in the same place for multiple sheets of paper?

    Reply
    • Marcie Besecker

      March 3, 2021 at 10:03 am

      Hi Donna. On the video you can see that I cut a template out and leave that in the Stamparatus and then lay the leaf pieces inside the template. This makes the whole process much faster! I hope that helps.

      Reply

Leave a Reply Cancel reply

Your email address will not be published. Required fields are marked *

Primary Sidebar

Shop my Online Stampin' Up! Store
  • Facebook
  • Instagram
  • Pinterest
  • YouTube

Marcie Besecker

Paper Crafter
Contact Me!

2025-2026 Annual Catalog

2025-2026 Annual Catalog

STAMP N STORAGE SHOPPING

I love the products from Stamp-n-Storage. In full disclosure, I am an affiliate with Stamp-n-Storage which means I may get commissions if you click on links I provide and decide to purchase anything from this company. I highly recommend this company.

The content in this blog is the sole responsibility of Marcie Besecker as an Independent Stampin' Up! Demonstrator. The use of and content of classes, services or products offered is not endorsed by Stampin' Up!

[mc4wp_form id=”975″]

Archives

Categories

Content © Marcie Besecker, All Rights Reserved. Privacy Policy
Genesis for Wordpress customized by WebsByAmy.