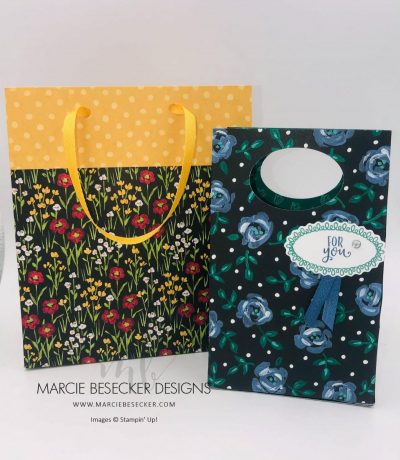
Creating these Two Fast and Simple Gift Bags using DSP is one of the best ways to use up retired DSP. So many of us hoard our paper, you know it’s true. I know I do. I used the FREE Field and Flowers DSP from the Sale-a-bration catalog.

Measurements and PDF
Both of these bags are so simple. Here is a PDF for Two Sizes of DSP Gift Bags for both bags.
Larger Bag
- Use 2 pieces of 12” x 12” DSP
- Score one side of DSP at 2”. Think about the DSP direction of the flap and the bag.
- Score remaining 3 sides at 3”.
- Card stock to reinforce measures 2 7/8” inch by 5 3/4” inch.
- Cut the tabs off of the bottom of one of the sheets (the two outside tabs). Wedge tabs on other piece.
Smaller Bag (from Pootles Paper Craft)
- DSP 12” x 8”
- On the SHORT side first, score at 2” which will be the bottom of the bag.
- Along the LONG side, score at 2, 5 ¾, 7 ¾, and 11 ½”.
- At the 1” and 6 ¾”, partially score down the side until almost the next score line. This helps with the crease down the side of the bag for folding.
- Add a bottom support panel of 1 7/8” x 3 ½”
- Cut the flaps and wedge for easy closing.
Video
Once you see this video, it will help understand the brief directions above.
I hope you give this a try. It really is easy. You can also put them together and not adhere the bottom and store them until you need them.

Supplies
Supplies are listed on my blog and in the description of the video on YouTube.
Leave a Reply